Searching for that perfect pop of color to brighten your manicure? Turquoise nail designs might just be the refreshing splash you’ve been looking for. This vibrant blue-green hue brings a touch of tropical paradise to your fingertips, making it an ideal choice for both summer adventures and winter getaways.
We’ve rounded up the most stunning turquoise nail ideas that’ll transform your everyday look into something extraordinary. From subtle turquoise accents to bold geometric patterns, these designs work beautifully across all nail shapes and lengths. Whether you’re heading to a beach vacation or simply want to add some color to your everyday style, these turquoise inspirations will have you booking your next nail appointment ASAP.
10 Stunning Turquoise Nail Ideas to Brighten Your Manicure
1. Turquoise Ombré Nails
Turquoise ombré nails create a stunning gradient effect that transitions from light to dark turquoise. The soft blending technique captures the mesmerizing essence of ocean waters moving from shallow to deep. Nail technicians achieve this look using a makeup sponge to gently tap the different shades onto nails. Try pairing this style with a matte top coat for an ultra-modern twist that adds dimension to your manicure.
2. Marble Turquoise Design
Marble turquoise designs incorporate swirls of white, gold, or black with turquoise for a luxurious stone-like appearance. These intricate patterns mimic natural marble’s veining, creating a sophisticated yet eye-catching manicure. Artists use thin brushes or toothpicks to create delicate lines that intertwine across the nail surface. Adding a glossy top coat enhances the marble effect by giving it depth and a polished finish.
3. Turquoise French Tips
Turquoise French tips offer a colorful twist on the classic French manicure that instantly refreshes your look. The vibrant blue-green shade replaces traditional white for a modern update that still maintains elegance. Nail artists often add thin metallic lines between the tip and nail bed for a more defined separation. Consider varying the thickness of the tips from nail to nail for a contemporary, asymmetrical approach.
4. Turquoise and Gold Accent Nails
Turquoise and gold accent nails combine royal elegance with tropical vibrancy for a truly luxurious manicure. The rich metallic gold elements complement turquoise’s brightness, creating a balanced yet bold statement. Popular designs include gold foil flakes, thin striping tape, or delicate hand-painted details against a turquoise background. This combination works particularly well for special occasions or when you want to add some glamour to your everyday look.
5. Turquoise Geometric Patterns
Turquoise geometric patterns feature clean lines and shapes for a modern, artistic manicure. Sharp triangles, diamonds, and abstract shapes in turquoise tones create a contemporary design that stands out. Nail techs use striping tape to achieve perfectly straight lines that form interesting geometric compositions. Mixing matte and glossy finishes within the same geometric design adds another dimension of visual interest.
6. Turquoise Glitter Gradient
Turquoise glitter gradient nails transition from a solid turquoise base to sparkling glitter tips for a mermaid-inspired effect. The gradually increasing density of glitter particles creates movement and draws attention to your fingertips. Holographic or iridescent glitters enhance the magical quality by reflecting different colors as you move your hands. This design catches light beautifully, making it perfect for beach vacations or summer festivals.
7. Negative Space Turquoise Nails
Negative space turquoise nails incorporate your natural nail as part of the design, creating modern, minimalist patterns. The contrast between bare nail and vibrant turquoise polish creates visually striking effects that appear intricate yet feel understated. Artists often use vinyl stencils to create precise shapes like crescents, triangles, or abstract forms. This style works wonderfully with both short and long nail beds, as the negative space creates an elongating effect.
8. Turquoise Animal Print
Turquoise animal print nails blend wild patterns with this vibrant hue for a fun, statement-making manicure. Leopard spots, zebra stripes, or snake patterns in turquoise and black create an unexpected twist on traditional animal prints. Nail artists sometimes add white highlights to make the patterns pop against the turquoise background. This playful design works beautifully as an accent on one or two nails paired with solid turquoise on others.
9. Turquoise Stone Effect
Turquoise stone effect nails mimic the natural mineral’s distinctive appearance with speckled or veined patterns in varied blue-green tones. The organic-looking design captures the authentic stone’s texture and depth through carefully placed dots and lines. Artists use specialized brushes or dotting tools to create realistic mineral-like variations across the nail surface. Finishing with a high-shine top coat enhances the gemstone quality, making your nails look like precious jewelry pieces.
10. Turquoise and Silver Studs
Turquoise and silver studs combine smooth polish with metallic embellishments for an edgy yet sophisticated manicure. Small silver studs, chains, or rhinestones create interesting textures against the vibrant turquoise background. Placement options include stud borders, diagonal lines, or scattered patterns that catch light as you move. This design brings dimension to your nails while maintaining a balanced look that works for both casual and formal settings.
Tropical Ocean Turquoise Ombré Nails
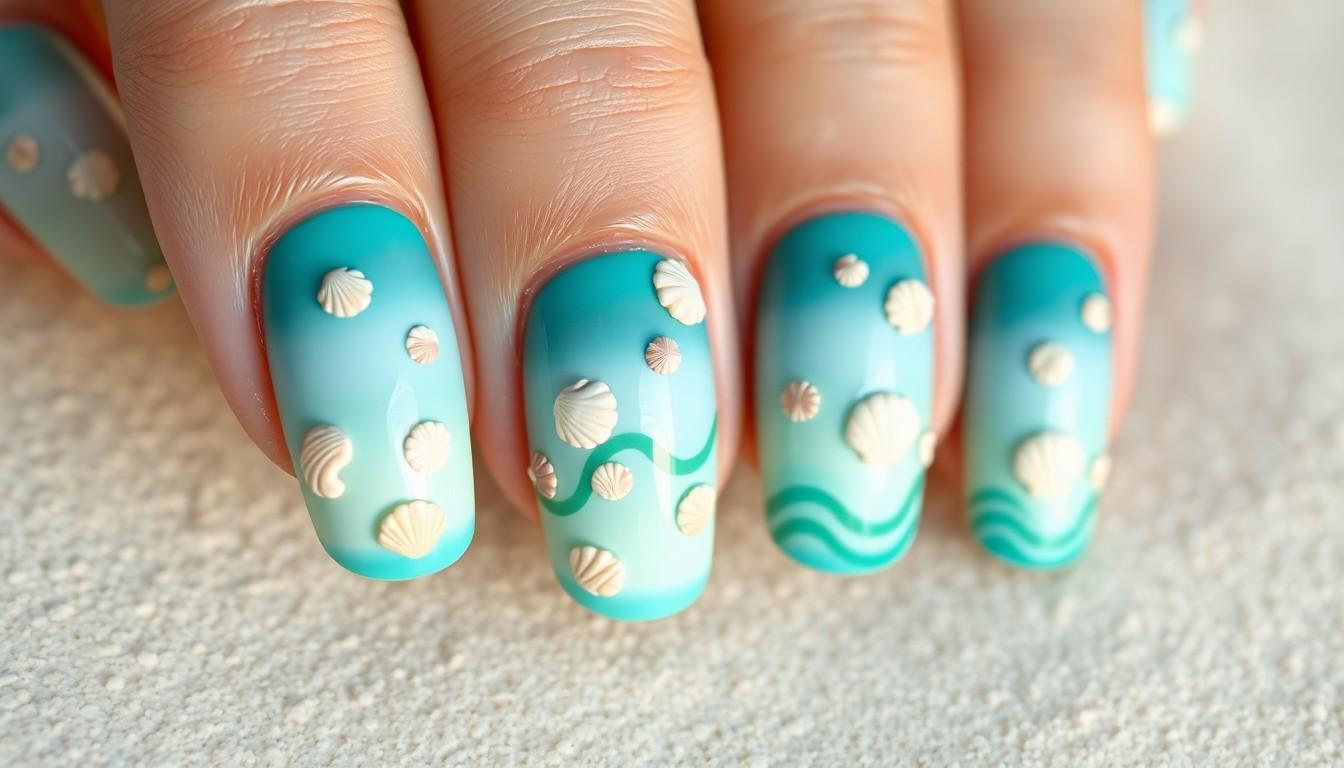
Tropical ocean turquoise ombré nails capture the essence of ocean waves with a stunning gradient effect that transitions from light to dark turquoise tones. This eye-catching design mimics the various shades of blue-green found in tropical waters, creating a refreshing and vacation-ready manicure that’s perfect for summer but works year-round.
Creating the Perfect Gradient Effect
Achieving a flawless turquoise ombré requires exact techniques to blend colors seamlessly. Start by applying a white base coat to make your turquoise shades pop with maximum vibrancy. Use a makeup sponge to dab different shades of turquoise polish in overlapping sections, working from lightest at the tip to darkest near the cuticle. Gentle dabbing motions help create that smooth transition between colors without harsh lines. Consider using nail guides or tape for more precise color separation before blending. Enhance your tropical theme by adding delicate nail art elements such as tiny seashells, starfish, or subtle wave patterns using either stamps or freehand techniques. Finish with a glossy top coat to seal your design and add dimension that mimics the reflective quality of water.
Best Polish Brands for Turquoise Ombré
Several high-quality polish brands offer the perfect turquoise shades for creating stunning ombré effects. Butter London stands out for their long-lasting formulas and variety of turquoise tones that blend beautifully in gradient designs. Essie provides an excellent range of blue-green shades with smooth application properties that make them ideal for gradient nail art. OPI offers many ocean-inspired colors with vibrant pigmentation and impressive durability, making their polishes perfect for lasting turquoise ombré manicures. Sally Hansen presents affordable options in their collection, particularly in their quick-drying Insta-Dri line, along with specialized tools designed specifically for creating gradient effects. Choosing polishes from these reputable brands ensures rich color payoff and proper consistency for blending, two crucial factors for achieving professional-looking tropical ocean turquoise ombré nails.
Turquoise and Gold Accent Nail Designs
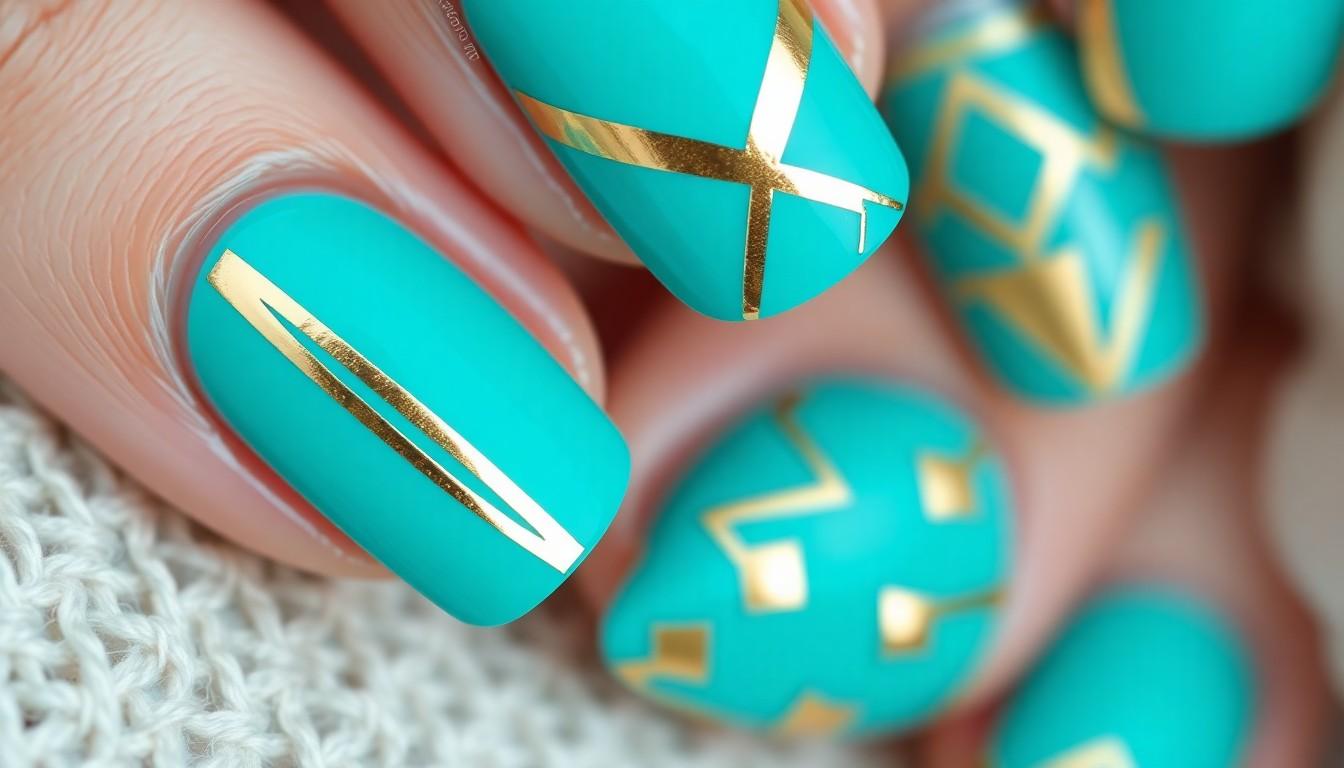
Combining the vibrant color of turquoise with the luxury of gold creates a stunning contrast that elevates any manicure. This elegant pairing offers endless possibilities for creating eye-catching designs that work for both everyday wear and special occasions.
Metallic Striping Techniques
Metallic striping adds a sleek, modern touch to turquoise nails while creating visual interest. Achieve perfect stripes using the tape method by applying turquoise polish first, allowing it to dry completely, then placing nail tape in your desired pattern before applying gold polish over the top. Remove the tape immediately after applying the gold polish to reveal crisp, clean lines with no bleeding. Striping brushes offer more flexibility for creating thin, precise lines in various directions – horizontal stripes create a widening effect while vertical stripes can make nails appear longer. Specialized nail guides and stickers designed specifically for nail art help create professional-looking results even for beginners who might struggle with freehand techniques.
Turquoise and Gold Geometric Patterns
Geometric patterns transform turquoise and gold combinations into artistic statements. Chevron designs featuring alternating turquoise and gold create ever-changing zig-zag effects that draw attention to your fingertips. Triangle patterns offer versatility – try filling entire triangular sections with gold polish against a turquoise background, or use fine brushes to outline triangle shapes for a more delicate approach. Mosaic effects, created by painting small squares or dots in alternating turquoise and gold colors using dotting tools, produce intricate designs reminiscent of ancient art. These geometric patterns work beautifully as accent nails, with one or two statement nails complementing solid turquoise or gold nails for a cohesive yet interesting manicure.
Matte Turquoise Nail Art Inspirations
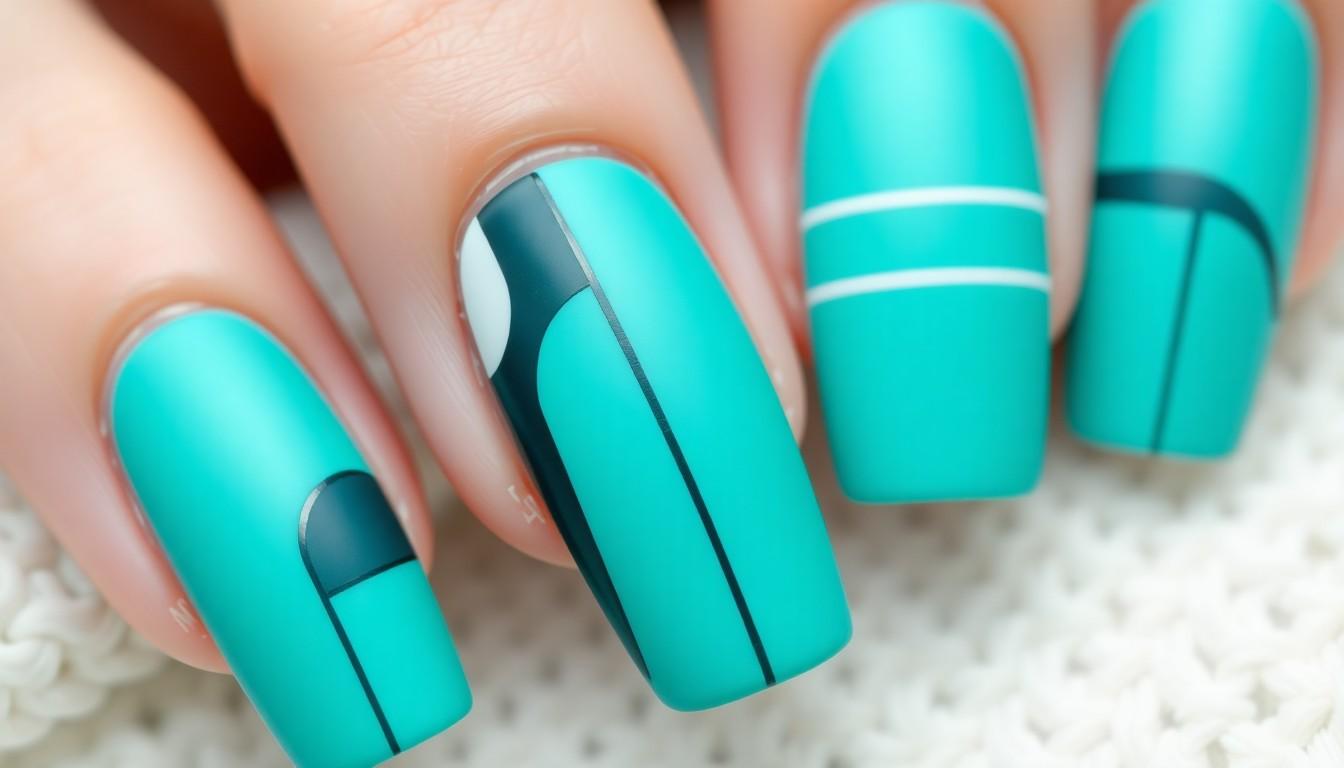
Matte turquoise nail designs bring a sophisticated edge to this vibrant color, creating a flat, velvety finish that stands out from traditional glossy manicures. These subdued yet striking designs offer a modern twist on turquoise that works beautifully across seasons and occasions.
Achieving the Perfect Matte Finish
Creating a flawless matte turquoise look starts with proper nail preparation and technique. Always apply a quality base coat to protect your natural nails before layering on your matte turquoise polish. Thin application is crucial when working with matte formulas – apply multiple light coats rather than one thick layer to prevent pooling and ensure even coverage. Between each coat, allow sufficient drying time to avoid smudges and imperfections that are more noticeable on matte surfaces. For best results, finish with a specialized matte top coat designed specifically to maintain the flat appearance without adding unwanted shine. Remember to avoid regular glossy top coats, as they’ll instantly transform your matte creation into a traditional shiny manicure.
Combining Matte and Glossy Turquoise
Playing with texture creates dimension in turquoise nail designs by strategically mixing matte and glossy finishes on the same nail. Try applying a matte turquoise base coat across all nails, then add glossy turquoise details like stripes, dots, or geometric patterns for striking contrast. Alternatively, reverse this approach with a glossy turquoise base topped with matte accents using nail art brushes or stencils. French tips offer another perfect opportunity to combine textures – pair a matte turquoise nail bed with a glossy turquoise tip or vice versa. Geometric designs particularly showcase this texture play effectively, with clean lines separating matte and glossy sections for a modern, architectural appearance. This combination technique adds visual interest and depth to your turquoise manicure while demonstrating sophisticated nail artistry.
Turquoise Stone Marble Effect Nails
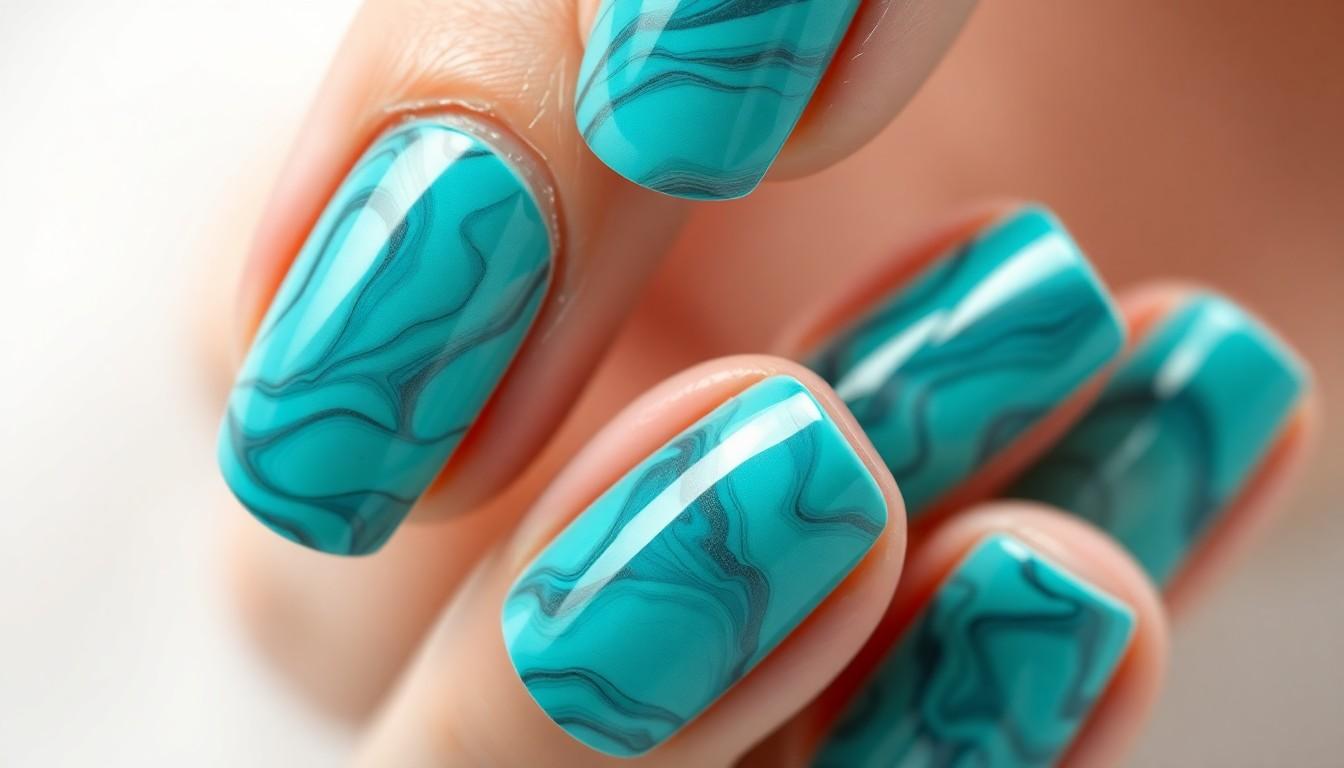
Turquoise stone marble effect nails capture the natural beauty of this precious gemstone with swirling patterns and multidimensional color. We’ve assembled expert techniques and tool recommendations to help you achieve this luxurious look that’s both elegant and eye-catching.
Techniques for Creating Realistic Marble Patterns
Creating realistic marble patterns requires precision and a few specialized techniques that mimic natural stone veining. Water marbling stands out as a popular method, involving dropping nail polish onto water’s surface and dipping your nail to transfer the pattern, though it does require practice and can be somewhat messy. Nail guides and stickers offer a more controlled approach, allowing you to create defined veins that resemble authentic marble formations with straight or curved lines. Sponging provides a subtler effect by dabbing small amounts of polish onto nails with a makeup sponge, creating that characteristic mottled appearance of natural turquoise stone. Stamping delivers the most precise results through specialized plates with marble patterns that transfer detailed designs directly to your nails.
For the most realistic turquoise stone effect, start with a turquoise base coat, then add a thin layer of clear polish. Drop tiny amounts of white or black polish onto the clear layer while it’s still wet. Use a toothpick or dotting tool to gently swirl these drops into marble-like patterns. Layering multiple thin coats creates depth and dimension, resembling genuine turquoise stone. Allow each layer to dry completely before adding the next to prevent smudging and maintain clean lines.
Tools Needed for Marble Nail Art
Your marble nail art toolkit should include these essential items for creating stunning turquoise stone effects:
- Quality Nail Polishes: Turquoise as your base color, plus white, black, and possibly gold or complementary colors for veining and accents
- Nail Dotting Tool or Toothpick: Essential for creating delicate swirls and marble veining patterns
- Clear Top Coat: Seals your design and adds shine while protecting your artwork
- Nail Guides or Stickers: Help create straight or curved lines that mimic natural stone formations
- Makeup Sponge: Perfect for creating textured effects and subtle color transitions
- Nail Stamping Plates and Tools: For achieving precise, detailed marble patterns with minimal effort
- Fine Nail Art Brushes: Allow for detailed work and adding thin, precise veining
- Dropper or Pipette: Enables you to place small, controlled drops of polish onto your nail
The layering technique works particularly well with turquoise stone designs, as the semi-transparent quality of properly thinned polish creates the depth that’s characteristic of natural turquoise. Combining these tools and techniques allows you to create a sophisticated turquoise marble effect that looks professionally done yet can be achieved at home with some practice and patience.
Turquoise French Tips with a Modern Twist
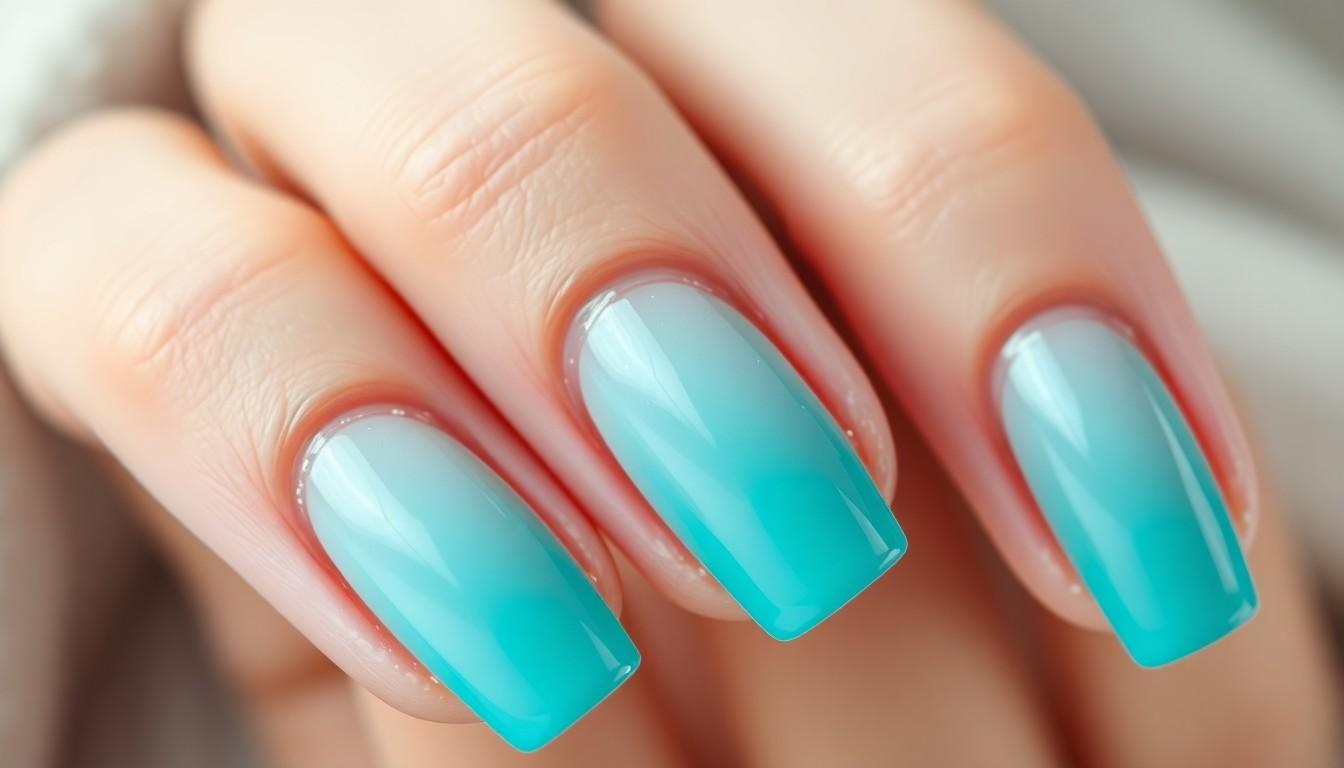
Traditional French manicures get a vibrant update with turquoise tips that add personality and flair to this classic nail design. We love how this refreshing blue-green shade transforms a timeless look into something contemporary and eye-catching.
For a modern take on the classic French manicure, use turquoise as your primary color instead of traditional white. Paint the tips of your nails in a vibrant turquoise shade while keeping the rest of the nail a neutral color like beige or clear. Try experimenting with different shades of turquoise, such as aqua or sea foam tones, to give the look a fresh and trendy feel.
Angled French Tip Variations
Angled French tips offer a sleek alternative to the traditional straight-line design by incorporating geometric elements that instantly modernize your manicure. The diagonal placement creates visual interest and elongates the nail shape for a more sophisticated appearance.
To create this look, paint your tips at an angle rather than following the conventional straight line across the nail. Apply turquoise polish to the angled tips while maintaining a contrasting color for the nail base. This ever-changing approach transforms the standard French manicure into a contemporary statement piece that showcases your attention to detail and fashion-forward style.
Glitter-Enhanced Turquoise Tips
Adding glitter to turquoise French tips elevates your manicure with dimension and sparkle that catches the light beautifully. This enhancement works particularly well for special occasions or when you want to add extra glamour to your everyday look.
Apply fine glitter polish over your turquoise tips for subtle shimmer, or mix glitter directly into the turquoise polish for an integrated sparkly effect. Gold or silver glitter complements turquoise especially well, creating a luxurious contrast that draws attention to your nail design. For maximum impact, consider using a gradient application with concentrated glitter at the very tip that gradually fades as it moves toward the base of the nail.
Turquoise Nail Designs with Floral Accents
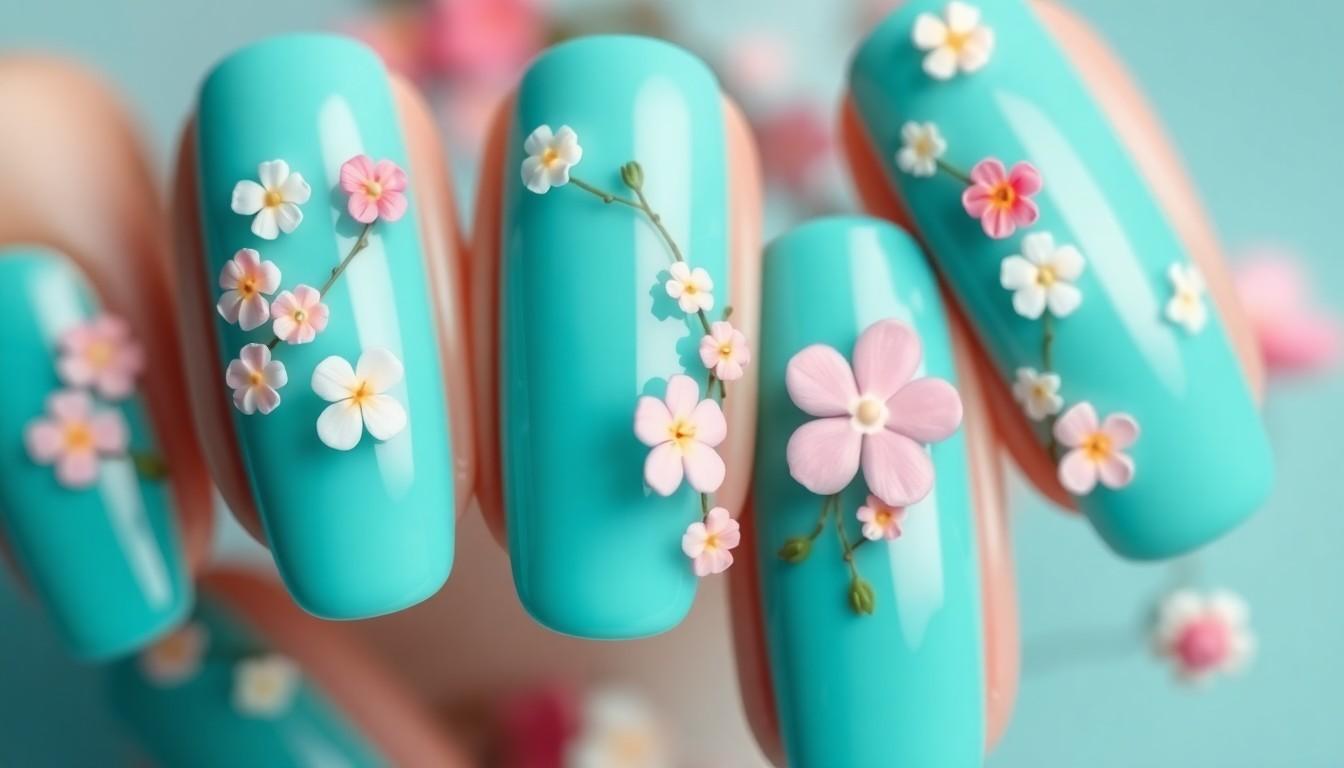
Turquoise nails reach new heights of elegance when paired with floral accents, creating a perfect balance of vibrant color and natural beauty. These designs combine the refreshing appeal of turquoise with delicate floral elements for truly eye-catching manicures.
Summer-Inspired Flower Details
Summer calls for nail designs that capture the season’s bright energy, and turquoise serves as the perfect backdrop for floral motifs that evoke warm days and blooming gardens. Pastel turquoise bases adorned with delicate flower details create a light, breezy aesthetic ideal for beach days and summer festivals. These designs often incorporate thin, precise floral motifs that don’t overwhelm the beautiful base color but complement it perfectly.
Bohemian turquoise designs take summer florals to the next level by integrating small gems and intricate lace patterns alongside the floral elements. This combination works wonderfully for music festivals or casual city outings where your nails can make a statement. Adding contrasting colors like pink and white flowers against the turquoise background creates a stunning visual effect that draws attention to your manicure.
Mehndi-inspired floral arrangements on turquoise nails offer a sophisticated summer look with their intricate, lacy patterns that wrap elegantly around each nail. These detailed designs transform simple turquoise nails into wearable art, perfect for special summer occasions or when you want your manicure to serve as a conversation starter.
Minimalist Floral Elements on Turquoise Base
For those who prefer subtle nail art, minimalist floral elements on a turquoise base provide the perfect balance of color and design without overwhelming. Small, strategic floral motifs placed at the tip or center of each nail add just enough detail to elevate a simple turquoise manicure. These understated designs work beautifully with both glossy and matte finishes, allowing the turquoise to remain the star while the floral accents add personality.
Neutral-colored French tips paired with a turquoise base create a modern canvas for minimal flower details. This combination offers a fresh take on the classic French manicure while incorporating natural elements that soften the overall look. Adding a small amount of glitter to these designs can enhance the floral motifs and catch the light in surprising ways.
Three-dimensional flower designs, though minimalist in their application, create striking texture against a smooth turquoise background. These raised elements add depth and dimension to the manicure while maintaining an elegant, refined appearance. The contrast between the flat turquoise base and the 3D floral elements creates visual interest that works for both everyday wear and special occasions.
Turquoise and Silver Geometric Nail Art
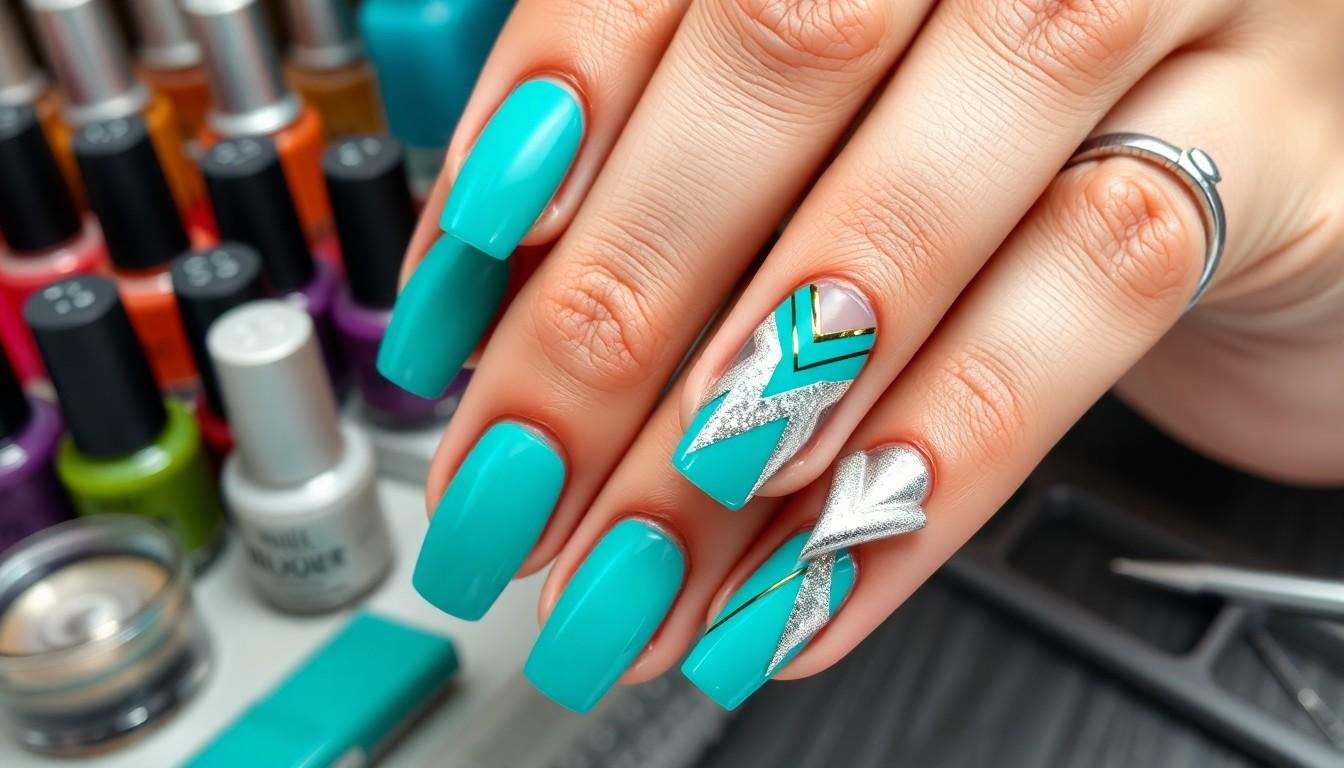
The striking combination of turquoise and silver creates a captivating contrast that’s perfect for geometric nail designs. This ever-changing duo offers endless possibilities for both beginners and nail art enthusiasts looking to make a statement with their manicure.
Simple Lines and Shapes for Beginners
Beginners can easily jump into geometric nail art with basic turquoise and silver designs. Start with a turquoise base coat and add simple silver geometric shapes like triangles, squares, or circles for an eye-catching effect. Creating chevron patterns using both colors delivers a stylish yet straightforward design that anyone can master with minimal tools. Tape works wonderfully for achieving clean, precise lines when crafting basic geometric patterns. Silver outlines around turquoise shapes provide definition and a polished finish that elevates even the simplest designs. Try alternating turquoise and silver polishes on different nails for a coordinated look that doesn’t require intricate detailing but still captures the geometric aesthetic.
Advanced Geometric Pattern Ideas
Advanced nail artists can explore intricate geometric patterns that combine turquoise and silver in sophisticated ways. Detailed mandalas featuring concentric turquoise shapes with silver detailing create mesmerizing focal points on accent nails. Mosaic-inspired designs using various shades of turquoise alongside metallic silver pieces produce stunning abstract patterns that resemble artisan jewelry. Holographic or glitter polish adds dimension to geometric patterns, creating a multi-faceted appearance that shifts in different lighting. Three-dimensional effects can be achieved by layering geometric shapes in alternating colors or adding rhinestones at intersection points of the design. Gradient effects blending turquoise into silver form a perfect backdrop for complex geometric line work, offering depth and visual interest to your manicure. Pinterest boards dedicated to turquoise nail art provide abundant inspiration for these advanced geometric designs, showcasing creative combinations and techniques to experiment with at home.
Turquoise Negative Space Manicures
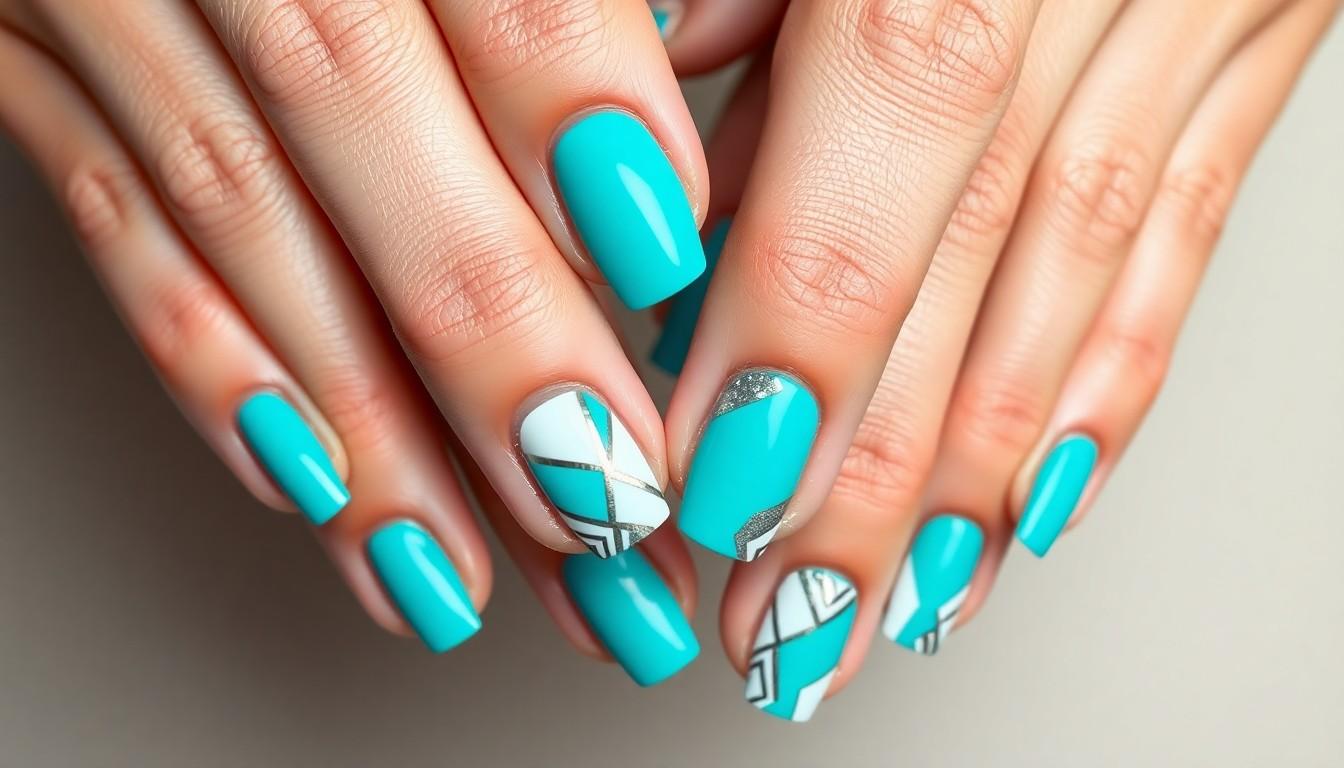
Negative space manicures with turquoise polish create striking visual impact by incorporating your natural nail into the design. These contemporary looks balance color with bare areas for a sophisticated, minimalist aesthetic that’s both trendy and elegant.
Minimalist Approach
Minimalist turquoise negative space designs offer understated elegance with maximum impact. Apply turquoise polish to only a portion of your nail—perhaps a small stripe along one edge, a geometric accent, or just the tip—while leaving the rest of the nail bare for a clean, modern effect. This technique works beautifully on short nails by creating the illusion of length and pairs perfectly with a glossy top coat to enhance the contrast between polished and unpolished areas. Try painting half your nail diagonally with turquoise while keeping the other half clear for an instantly chic look that requires minimal artistic skill.
Geometric Patterns
Geometric negative space designs with turquoise polish create architectural interest on your fingertips. Paint turquoise triangles, squares, or circles on a clear base, leaving strategic areas unpainted to showcase your natural nail beneath. These patterns add structure and visual interest while maintaining an air of sophistication. Create a distinctive look by applying turquoise polish to form a triangle at the nail tip while keeping the rest clear, or alternate between different geometric shapes across nails for a cohesive yet varied manicure. Geometric designs particularly pop when paired with matte finishes that highlight the shapes’ clean edges.
Accent Nails
Accent nails provide the perfect opportunity to showcase turquoise in a negative space manicure. Designate one or two nails (typically the ring finger and thumb) for complete turquoise coverage, while applying minimal turquoise elements—like thin stripes, small dots, or tiny crescents—to the remaining nails. This balanced approach lets you enjoy bold color while maintaining an overall refined aesthetic. Accent nails create focal points that draw attention to your manicure without overwhelming your entire look, making them ideal for those new to negative space designs or wanting a more subtle entry into turquoise nail art.
Creating Clean Lines and Shapes
Achieving precise lines and shapes in turquoise negative space manicures requires proper technique and tools. Use nail tape to create razor-sharp boundaries between polished and unpolished areas—simply apply the tape in your desired pattern, paint over it with turquoise polish, then remove while the polish is still slightly wet for crisp, professional results. Stamping plates offer another method for adding intricate patterns with turquoise polish, allowing you to transfer detailed designs without freehand painting skills. Dotting tools create perfect circles and can be used to make small, precise lines or patterns that add delicate detail to your negative space design.
Innovative Negative Space Concepts
Turquoise negative space manicures offer endless creative possibilities beyond basic designs. Create a stunning ombre effect by gradating turquoise from your nail tip toward the cuticle while leaving portions clear, producing a seamless transition that adds depth and dimension. Diagonal designs split your nail with turquoise on one side and negative space on the other, creating a bold geometric statement that can be varied across nails for added interest. Abstract negative space art incorporates irregular turquoise shapes or controlled splatters on a clear base for an artistic, free-form approach that celebrates imperfection and creativity.
Turquoise Nails with Crystal and Rhinestone Embellishments
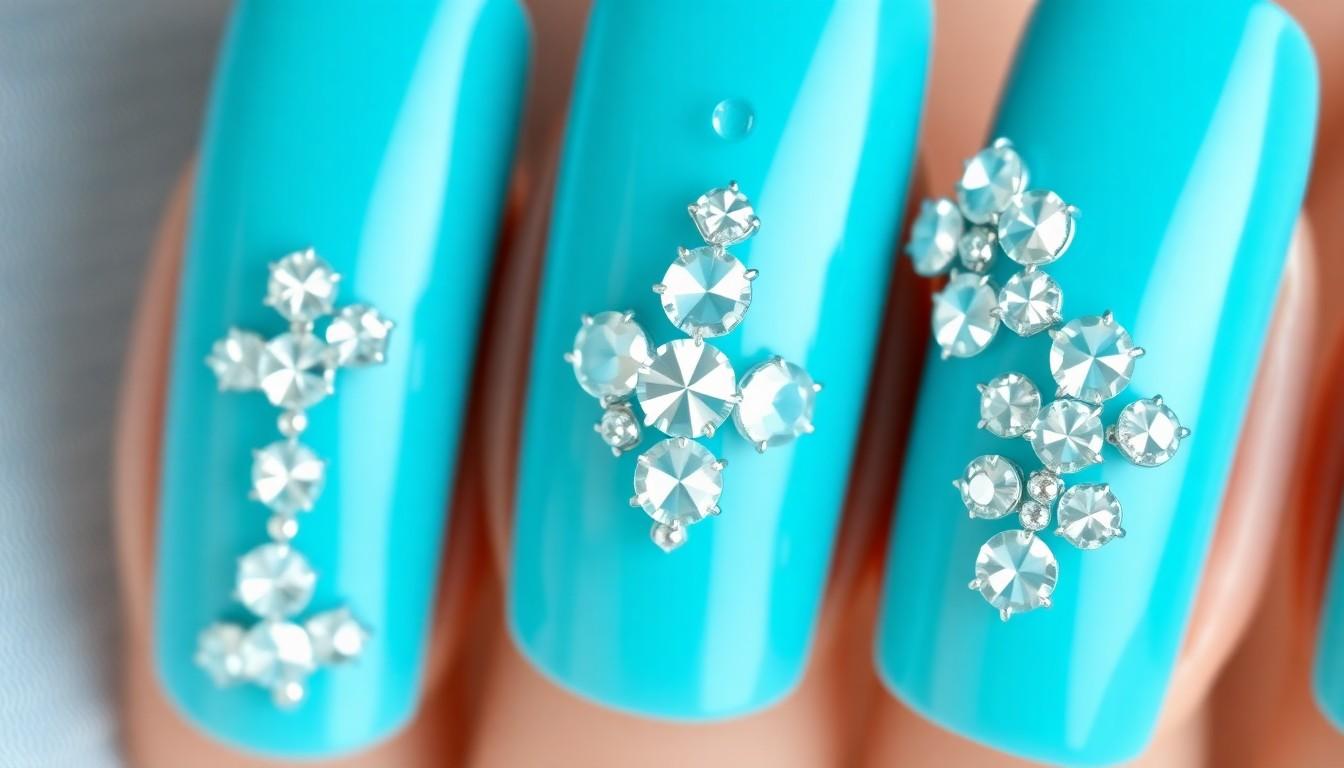
Add a touch of glamour to your turquoise manicure with sparkling crystals and rhinestones. These eye-catching embellishments transform a simple turquoise nail design into a statement piece that’s perfect for special occasions or whenever you want to add some extra dazzle.
Placement Ideas for Maximum Impact
Creating a stunning turquoise nail design with crystals requires strategic placement for maximum visual impact. Accent nails offer a perfect opportunity to showcase your rhinestones, particularly on almond-shaped nails which provide an elegant backdrop for these sparkling elements. Positioning crystals along the tips of your nails draws attention to their shape while adding a sophisticated touch of glamour. For a more intricate approach, incorporate rhinestones into nail art patterns such as waves, florals, or geometric designs to add dimension and sparkle. Placing a large statement crystal in the center of each nail creates a striking focal point, especially against a solid turquoise background. Try combining turquoise with complementary colors like brown, blue, and gold for a luxurious multicolored design enhanced with strategically placed rhinestones. Our favorite summer-inspired design features turquoise waves over a transparent base with crystals representing sunlight glinting off water—perfect for beach vacations!
Securing Embellishments for Longevity
Ensuring your crystal embellishments stay firmly attached requires proper application techniques. Strong nail glue specifically designed for rhinestones provides the most secure foundation—simply apply a small amount to the back of each crystal before pressing firmly onto the nail surface. Sealing your design with a clear top coat prevents embellishments from loosening while simultaneously protecting your polish and extending the wear time of your manicure. Nail adhesive tabs offer an even more secure application method; place these under your crystals before applying top coat for maximum durability. Professional application might be worth considering if you lack experience with nail embellishments, as technicians have specialized tools and techniques to ensure your crystals remain perfectly positioned for longer. Always allow sufficient drying time between applying embellishments and top coat to prevent smudging your design. Remember that proper maintenance, including gentle hand washing and avoiding harsh chemicals, will help preserve your beautiful turquoise and crystal nail art for days longer than regular polish.
Essential Products and Tools for Perfect Turquoise Nails
Turquoise nails offer endless creative possibilities that can elevate your personal style whether you prefer subtle elegance or bold statements. We’ve seen how versatile this captivating blue-green shade can be across various designs from ombré and marble effects to geometric patterns and floral accents.
To create these stunning looks at home you’ll need quality turquoise polishes from brands like OPI Essie and Butter London. Don’t forget essential tools including thin nail art brushes dotting tools and striping tape for precise designs. A good base coat and durable top coat (both matte and glossy) will ensure your artwork lasts.
Ready to make waves with your next manicure? With these turquoise nail ideas you’ll definitely turn heads and express your unique personality through beautifully crafted nail art that’s both trendy and timeless.
Frequently Asked Questions
What makes turquoise a good color choice for nail designs?
Turquoise is versatile and works in any season. This vibrant blue-green hue adds a refreshing touch to your look, making it suitable for both summer beach vibes and winter getaways. It complements most skin tones and can be adapted to various styles, from subtle accents to bold statements. Whether you prefer minimalist designs or elaborate patterns, turquoise offers a unique pop of color that stands out without being overwhelming.
How can I achieve a perfect turquoise ombré nail design?
Start with a white base coat to make the turquoise colors pop. Use a makeup sponge to blend different shades of turquoise, starting with the lightest shade at the cuticle and darkest at the tip. Dab the sponge gently to create a smooth gradient. Clean up edges with a small brush dipped in nail polish remover. Finish with a glossy top coat to seal the design and enhance the dimensional effect.
What nail polish brands offer the best turquoise shades?
High-quality turquoise polishes are available from several reputable brands. Butter London offers rich, long-lasting turquoise shades with excellent coverage. Essie provides a range of turquoise tones from soft mint to deep teal. OPI’s collection includes various turquoise options with professional-grade formulas. Sally Hansen delivers affordable yet high-quality turquoise polishes. These brands all feature formulations that apply smoothly and maintain vibrant color.
How do I combine turquoise and gold in nail designs?
Pair turquoise as your base color with gold accents for an elegant contrast. Use striping tape to create clean gold lines on a turquoise background, or add gold foil for a luxurious touch. Create geometric patterns like chevrons or triangles using both colors. For a simpler approach, paint most nails turquoise and use gold polish or leaf on accent nails. Finish with a top coat to seal the design and enhance shine.
What’s the difference between matte and glossy turquoise nail designs?
Matte turquoise nails have a sophisticated, velvety finish without shine, creating a modern, understated look. Glossy turquoise nails feature a reflective, shiny surface that enhances color vibrancy and depth. Matte designs work well with minimalist patterns and geometric shapes, while glossy finishes complement sparkly embellishments and intricate details. You can create interesting contrast by combining both finishes in one design, using matte as the base with glossy accents.
How can I create turquoise stone marble nail effects?
Create realistic turquoise stone effects by layering different shades of turquoise, white, and hints of darker blue. For water marbling, drop polish colors into water and swirl with a toothpick before dipping your nail. Alternatively, use a small brush to create freehand marble patterns or sponge on different shades for a textured effect. Add small black lines to mimic natural stone veining. Finish with a clear top coat for dimension and protection.
What are some modern twists on turquoise French tips?
Modernize traditional French tips by using turquoise instead of white for the tips. Try angled or curved designs instead of straight lines. Create a reverse French manicure with turquoise at the cuticle instead of the tip. Add glitter or metallic accents along the tip line for extra dimension. Experiment with negative space by leaving parts of the nail bare within the design. These variations maintain the elegance of French tips while adding contemporary flair.
How can I incorporate floral elements with turquoise nails?
Paint turquoise as your base color, then add delicate floral details using white, pink, or yellow polish. For a minimalist approach, place small flower designs on just one or two accent nails. Use dotting tools to create simple daisy patterns or fine brushes for more intricate designs. Consider adding rhinestones as flower centers for dimension. Dried flowers can also be sealed between layers of top coat for a natural, pressed-flower effect.
What geometric patterns work best with turquoise and silver nail art?
Simple triangles, chevrons, and stripes are beginner-friendly geometric patterns that showcase the turquoise-silver contrast beautifully. More advanced designs include mandalas, mosaics, and interlocking shapes. Use thin striping tape to create clean lines and precise shapes. Try creating optical illusions with alternating turquoise and silver sections. For added dimension, incorporate negative space or add small rhinestones at the intersections of geometric elements.
How do I secure rhinestones and crystals on turquoise nail designs?
Apply turquoise polish and let it dry completely. Place a small dot of nail glue where you want each crystal. Use tweezers or a wax pencil to carefully position rhinestones onto the glue. Press gently to secure. Seal with a thick layer of clear top coat, avoiding direct contact with larger crystals as it may cloud them. For longer wear, apply another thin layer of top coat around the edges of embellishments after 1-2 days.


