Ready to add a splash of pink to your holiday manicure? Pink Christmas nail ideas offer a fresh twist on traditional holiday colors, combining festive cheer with feminine charm. Whether you’re looking for something subtle or statement-making, we’ve got you covered with the most trendy designs for the season.
We’ve curated the perfect collection of pink-themed Christmas nail art that’ll have everyone asking about your manicurist. From rose gold reindeer to blush pink snowflakes, these designs bring a modern touch to classic holiday motifs. The best part? Many of these styles work beautifully on both natural nails and extensions, giving you flexibility regardless of your nail type.
10 Elegant Pink Christmas Nail Designs for Holiday Glamour
1. Pink Frosted Tips with Silver Accents
Pink frosted tips create a wintery vibe that’s perfect for the holiday season. Apply a baby pink base coat over your entire nail, then use a makeup sponge to dab white polish on the tips for that frosted effect. After the base dries completely, add tiny silver dots or thin lines to mimic falling snow. This design works beautifully on all nail lengths, especially on longer nails where the gradient effect can truly shine.
2. Rose Gold Ornament Nails
Rose gold ornament nails capture holiday sophistication with minimal effort. Start with a metallic rose gold polish as your base, then use a thin brush to paint delicate ornament outlines in a darker pink or burgundy shade. Add small dots of white polish to create highlights on your ornaments. These nails seamlessly blend festive elements with a modern color palette that complements winter outfits.
3. Pink Christmas Sweater Pattern
Christmas sweater pattern nails bring cozy holiday vibes to your fingertips. Begin with a soft pink base coat, then use a dotting tool to create interlocking patterns resembling knitted designs. White, light pink, and a touch of red work wonderfully for the detailed pattern work. Seal your design with a matte top coat to enhance that knitted texture feel and give your nails a sophisticated finish.
4. Matte Pink with Glossy Snowflakes
Matte pink nails with glossy snowflakes create gorgeous texture contrast that catches the eye. Apply a vibrant pink polish and top with a matte finish coat. Once dry, use a clear polish to paint snowflake designs, which will appear glossy against the matte background. The dimensional effect looks particularly striking in holiday lighting and photographs beautifully for social media posts.
5. Pink Candy Cane Stripes
Pink candy cane stripes offer a playful twist on a classic holiday pattern. Paint your nails with a light pink base, then use striping tape to create diagonal lines. Fill alternate sections with white polish and a deeper pink shade. Finish with a high-shine top coat to mimic the sheen of real candy canes. This design works particularly well on longer nails where the stripes can fully develop.
6. Glitter Ombré Pink Christmas Nails
Glitter ombré nails transition beautifully from everyday wear to holiday parties. Start with a pale pink base at the cuticle, gradually blending into a denser pink glitter toward the tips. Use a makeup sponge to create the ombré effect without harsh lines. The sparkling gradient resembles freshly fallen snow catching the light, making these nails perfect for Christmas celebrations.
7. Pink Poinsettia Accent Nails
Pink poinsettia accent nails add a botanical touch to your holiday manicure. Apply a neutral pink base to all nails, then create detailed poinsettia flowers on one or two accent nails using a thin brush and deeper pink polish. Add gold dots to the center of each flower for a luxurious finish. These botanical designs provide sophisticated holiday flair without overwhelming your overall look.
8. Blush Pink with Gold Foil
Blush pink nails with gold foil accents exude quiet luxury perfect for upscale holiday events. Apply two coats of blush pink polish, then press small pieces of gold foil randomly across each nail while the second coat is still slightly tacky. Seal with a top coat to secure the foil and create a smooth finish. The combination looks especially elegant against winter formal wear.
9. Champagne Pink French Tips
Champagne pink French tips offer a festive upgrade to the classic French manicure. Use a sheer pink polish for the base and a metallic champagne pink for the tips. Add a thin line of fine silver glitter between the two colors for extra definition. This sophisticated design transitions seamlessly from office holiday parties to New Year’s celebrations with timeless elegance.
10. Pink Marble with Gold Accents
Pink marble nails with gold accents create a luxurious statement for holiday gatherings. Start with a white base, then drop small amounts of different pink polishes onto each nail. Use a toothpick to swirl the colors together gently, creating a marble effect. Once dry, add thin lines of gold polish to define the marble veins. This design mimics expensive stone, bringing an air of opulence to your holiday look.
Sparkling Pink and Silver Snowflake Nails
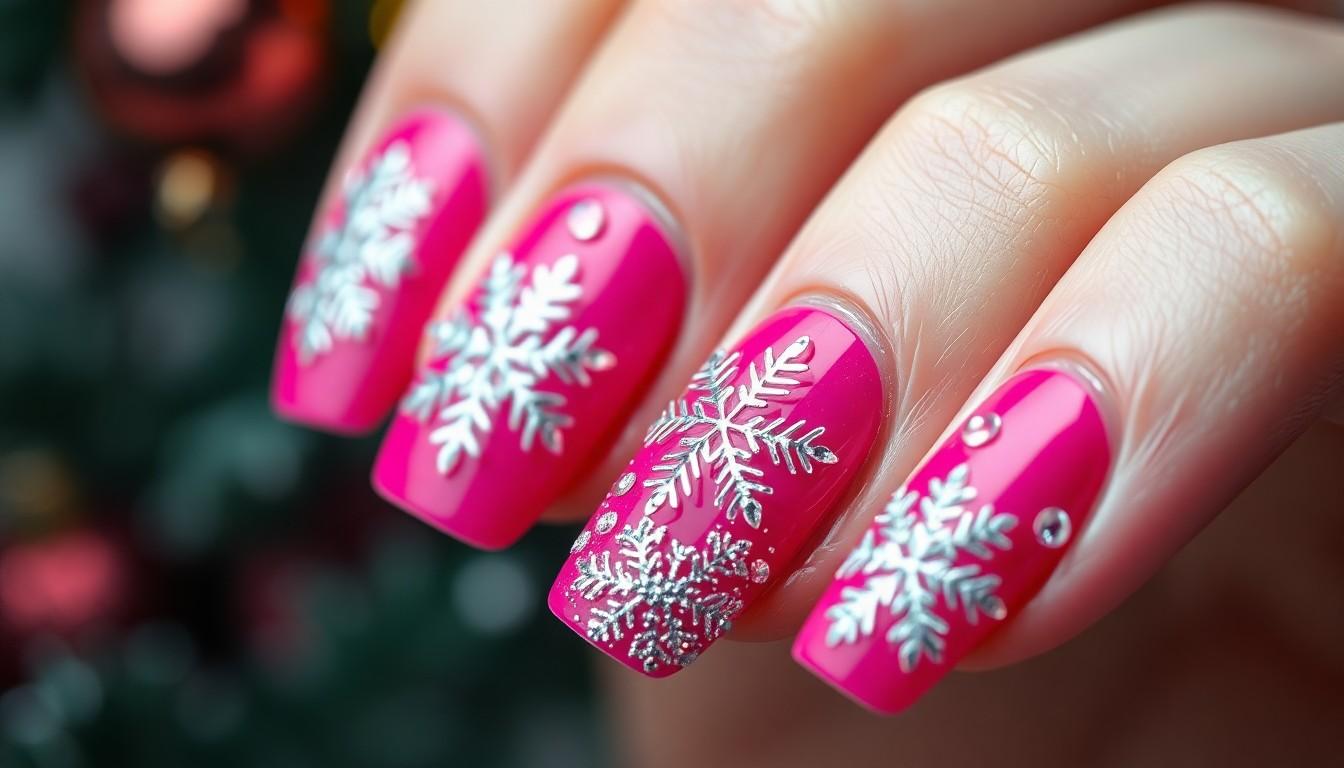
Sparkling pink and silver snowflake nails combine vibrant pink polish with elegant silver accents to create a festive yet sophisticated look. This design perfectly balances feminine charm with holiday spirit, making it an ideal choice for Christmas celebrations.
Creating the Perfect Snowflake Pattern
Getting those perfect snowflake patterns requires the right techniques and tools for flawless execution. Start with a smooth pink base coat—either light or bright pink depending on your preference—then use fine nail art brushes or specialized tools to paint delicate silver snowflakes. Nail stamps or decals with snowflake designs offer a quicker alternative for those who want precision without freehand painting. For symmetrical patterns, nail guides or stickers can help create balanced designs that look professionally done. White polish can also be used for the snowflakes before adding silver accents on top for a multi-dimensional effect.
Adding Dimension with Holographic Glitter
Holographic glitter transforms your pink and silver snowflake nails from pretty to spectacular by adding captivating depth and sparkle. Apply a clear top coat with holographic glitter directly over your snowflake designs to create a shimmering, three-dimensional effect that catches light from every angle. Mixing holographic glitter into your clear top coat before application ensures even distribution across the entire nail surface for a cohesive sparkly finish. The holographic elements create an icy, winter wonderland effect that enhances the snowflake motif while maintaining the feminine pink base. This additional layer of dimension makes your nail design truly stand out during holiday gatherings and festive events.
Candy Cane Inspired Pink and White Stripes
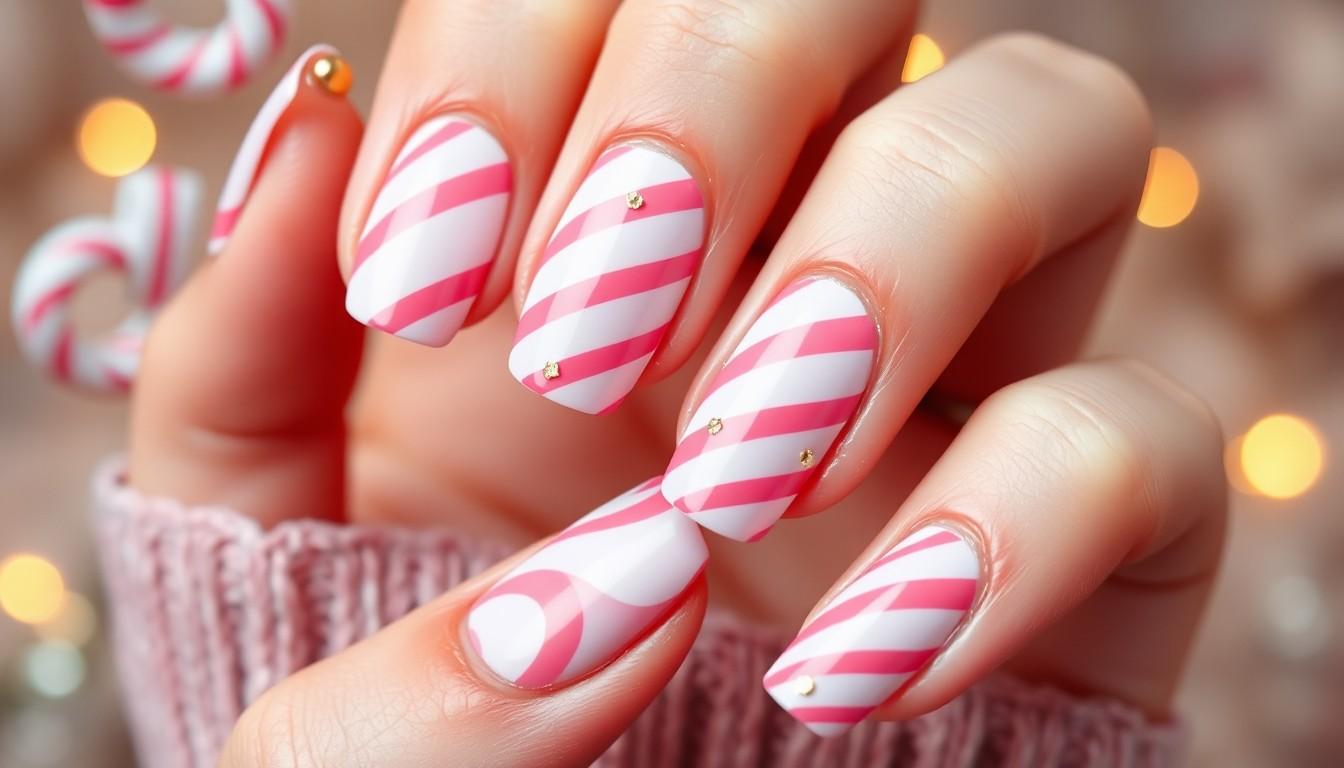
Candy cane inspired nail designs offer a perfect festive twist on traditional Christmas manicures with their playful pink and white color combination. This cheerful design mimics the beloved holiday treat while maintaining a feminine aesthetic that stands out from conventional red and green themes.
Mastering the Clean Line Technique
Achieving perfect stripes for candy cane nails requires precision and the right tools to create crisp, professional-looking lines. Nail guides or stickers serve as essential aids when painting straight stripes, allowing you to create flawless candy cane patterns without wobbles or smudges. Apply a soft pink base coat first, then once completely dry, place the nail guides diagonally across your nails for that classic candy cane look.
Good quality polish brushes make a important difference in your line work, as they provide better control during application. Let each color layer dry thoroughly before adding the next stripe to prevent color bleeding and maintain those sharp edges. For extra definition, consider using a thin detail brush to outline your stripes, creating a polished finish that elevates the entire design.
Incorporating Metallic Accents
Metallic elements transform candy cane inspired nails from cute to sophisticated by adding luxurious dimension and holiday sparkle. Gold or silver chrome powder dusted over selected stripes creates an eye-catching contrast against the pink and white base. Try an airbrushed pink center on a white base with a layer of chrome powder for a modern, stylish interpretation of the classic candy cane motif.
Accent nails featuring gold details alongside pink polish offer a glamorous twist on the traditional design. Consider creating a statement nail with a longer stiletto shape and gold metallic stripes alternating with pink ones for a bold holiday statement. For a more subtle approach, add tiny gold dots or thin gold stripes between your pink and white candy cane pattern, introducing elegance without overwhelming the playful design.
Festive Pink Ombré with Christmas Ornament Details
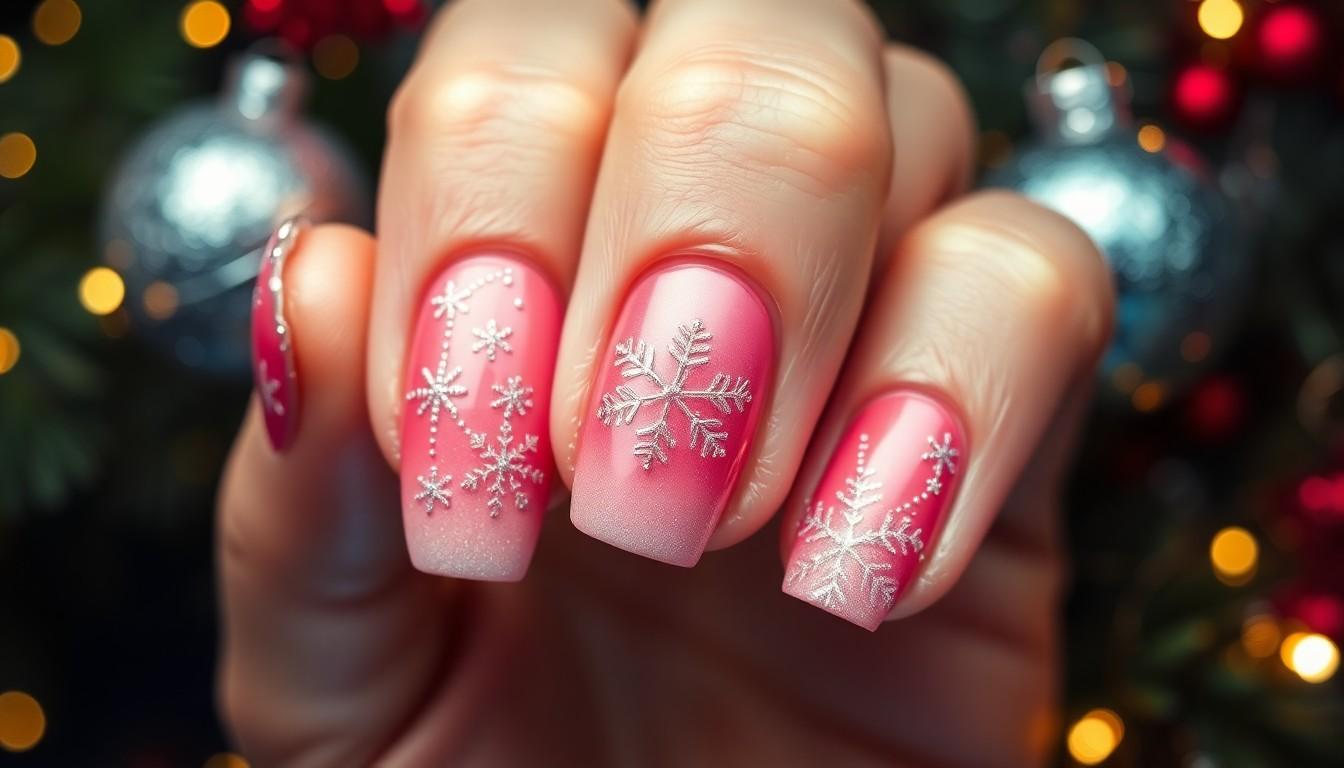
Creating a pink ombré effect with festive ornament details offers a sophisticated yet playful approach to holiday nail art. This technique combines the elegance of gradient color with charming Christmas elements for a manicure that truly captures the season’s spirit.
Achieving the Perfect Pink Gradient
The pink ombré technique creates a stunning gradient effect that transitions from light to deep pink shades. Start by applying a light pink polish near your cuticle area as your base color. Apply a medium pink shade to the middle section of your nails, gently blending where the colors meet. Finish with a rich, deeper pink at the tips for a dramatic effect. Using a makeup sponge significantly improves blending results—simply paint horizontal stripes of your chosen pink shades on the sponge and dab it onto your nails for a seamless transition. Clean lines can be maintained by using nail guides or tape around the edges of your nails before applying the gradient. This technique works beautifully on all nail lengths and shapes, making it versatile for everyone wanting to embrace holiday-themed nail art.
Adding Mini Ornament Art Details
Transform your pink ombré base into a festive masterpiece by incorporating Christmas ornament details. Glitter accents provide the simplest way to add sparkle—use a small detail brush to apply dots or small shapes resembling hanging ornaments with clear polish mixed with fine glitter. Nail stickers or decals featuring bells, stars, and Christmas trees offer a fool-proof method for those less confident in their artistic abilities. Hand-painted elements create the most personalized look—use a fine-tip nail brush to add delicate snowflakes, tiny candy canes, or miniature Christmas trees over your gradient background. For maximum impact, consider 3D nail art pieces that resemble actual ornaments, adhered with special nail glue for a textured effect. Gold accents pair particularly well with pink ombré designs, adding a luxurious dimension through simple stripes, dots, or ornament outlines. The contrast between the soft pink gradient and metallic gold details creates a sophisticated festive look that’s perfect for holiday parties and celebrations.
Pretty in Pink Christmas Trees and Holly Designs
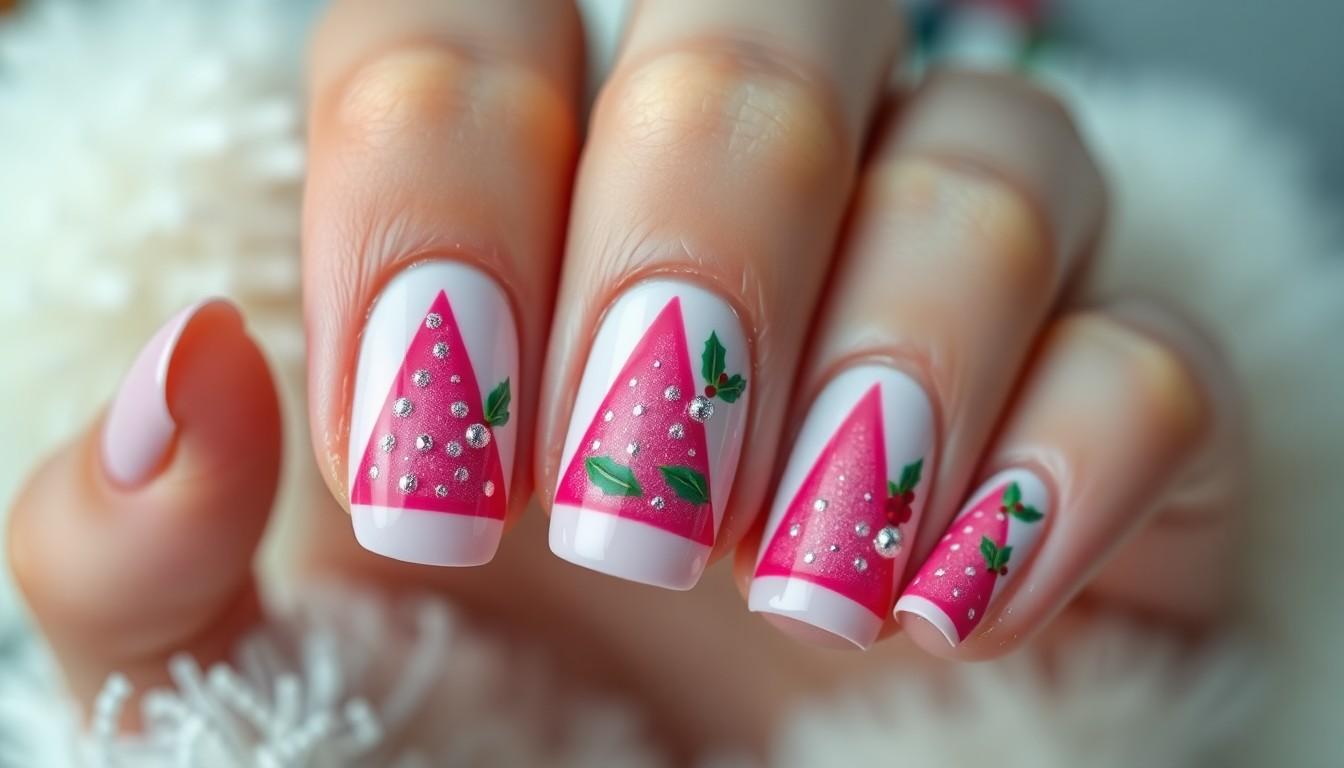
Pink Christmas nail art brings a fresh twist to traditional holiday designs while maintaining all the festive charm. Let’s explore how to create stunning pink Christmas trees and holly berry accents that will make your manicure stand out this season.
Perfecting the Miniature Christmas Tree Technique
Creating miniature Christmas trees on your nails starts with establishing a simple pink triangle shape as your base. Apply vibrant or pastel pink polish using a steady hand, forming the outline first before filling it in. Build realistic dimension by adding layers of branches with a fine detail brush, working from bottom to top for a natural appearance. Tiny ornaments can transform your trees from simple to spectacular—use a dotting tool to place small dots of metallic or glitter polish as decorative elements. For an eye-catching 3D effect, apply a layer of clear polish over your completed design and carefully position a tiny star or snowflake at the treetop. These pink Christmas trees pair beautifully with additional winter elements like glittery accents or delicate snowflakes for a cohesive holiday theme.
Creating Delicate Holly Berry Accents
Holly berry designs offer sophisticated seasonal charm when reimagined in pink tones. Begin with a light pink or blush base color to set the foundation for your holly accents. Paint small berries using red or darker pink polish with a fine detail brush, clustering them in groups of three for an authentic holly look. Green leaves surrounding the berries provide the perfect color contrast—create them using short, angular strokes that mimic holly’s distinctive pointed shape. For a more subtle interpretation, try using various shades of pink for both the berries and leaves, creating a monochromatic design that still captures the holiday spirit. Adding strategic touches of glitter or sparkles around your holly elements instantly elevates the festive feel of your manicure. These delicate holly berry accents work wonderfully as feature nails combined with solid pink polish on remaining fingers, creating a balanced and elegant Christmas nail look.
Sugar-Coated Pink Gingerbread Nail Art
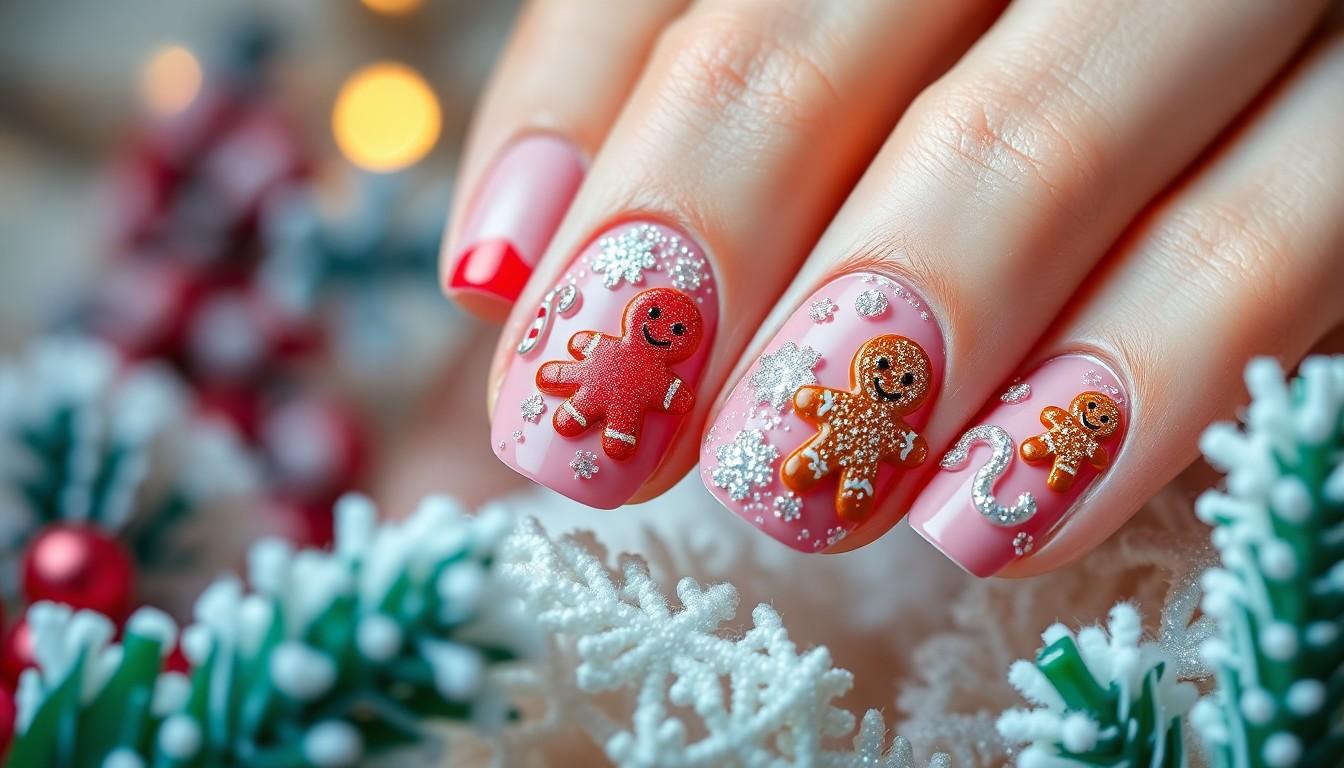
Create charming gingerbread-inspired nails that combine the sweetness of pink with festive holiday elements. These sugar-coated designs offer a delightful twist on traditional Christmas nail art by incorporating textured elements and sparkly finishes.
Working with 3D Textured Elements
Adding dimension to your pink gingerbread nail art transforms an ordinary manicure into a show-stopping holiday design. Rhinestones, beads, and specialized 3D nail charms like candy canes, snowflakes, or Christmas trees can be strategically placed to enhance your sugar-coated theme. Tiny gingerbread men charms or candy-shaped decorations work particularly well with pink backgrounds, creating a playful contrast against the soft base color. Apply these elements using strong nail glue or adhesive specifically designed for nail art to ensure they stay put throughout holiday celebrations. We recommend placing larger 3D elements as accent pieces on one or two nails rather than overwhelming every finger, allowing the textured components to truly stand out.
Adding Sparkly “Sugar” Effects
Capturing that perfect sugar-coated finish requires the right glitter application techniques to mimic the crystalline appearance of sugar. Glitter polish, loose holographic glitters, or fine shimmer particles can create this magical effect on your pink gingerbread designs. Apply a thin layer of clear glitter polish over completed nail art to instantly add a sugary sparkle reminiscent of freshly baked and decorated treats. For more dramatic sugar effects, try sprinkling loose glitter onto wet polish before it dries completely, then seal everything with a quality top coat to prevent shedding. Combining pink glitter with candy cane stripe patterns creates a particularly festive look, especially when the glitter is concentrated at the French tips. Glittery pink art designs can be further enhanced by incorporating small 3D gingerbread elements or candy decorations, making your holiday manicure truly stand out at seasonal gatherings.
Rose Gold and Pink Geometric Christmas Patterns

Looking for a modern twist on traditional Christmas nail art? Geometric patterns offer the perfect canvas to showcase stunning rose gold and pink combinations that are both festive and fashion-forward.
Combining Metallic Finishes for Maximum Impact
Rose gold metallic polish creates a luxurious foundation for pink Christmas nail designs. Apply rose gold glitter or metallic polish to create eye-catching accents such as stripes, dots, or small geometric shapes on a pink base coat. This combination instantly elevates your manicure with a sophisticated yet festive touch that catches the light beautifully. Try using rose gold as an accent color to outline geometric shapes like triangles or chevrons against a soft pink background for a contemporary holiday look that stands out.
For a glamorous approach, consider creating glittery French tips using a pink base with rose gold glitter tips. This design works particularly well when incorporating geometric elements within the glittery tips, adding visual dimension and complexity without overwhelming the overall aesthetic.
Creating Clean Geometric Shapes
Nail guides and stickers are essential tools for achieving precise geometric patterns with rose gold and pink. Start with a solid pink base coat, then apply nail tape in your desired pattern before adding rose gold metallic polish for impeccably sharp lines. Remove the guides while the polish is still slightly wet to prevent peeling and reveal crisp geometric edges.
Fine detail brushes allow for greater control when creating intricate designs such as triangular patterns or interconnected shapes. Reverse the color scheme by using rose gold as your base and adding pink geometric accents for a dramatic contrast that feels both festive and modern.
Knit-inspired patterns and snowflake designs take on new life when executed with this color combination. Use rose gold to outline delicate knit patterns or add sparkling details to snowflakes against a pink background. For maximum precision, consider using nail stickers specifically designed for geometric patterns, which can simplify the application process while maintaining a professional-looking finish.
Pastel Pink Winter Wonderland Scenes
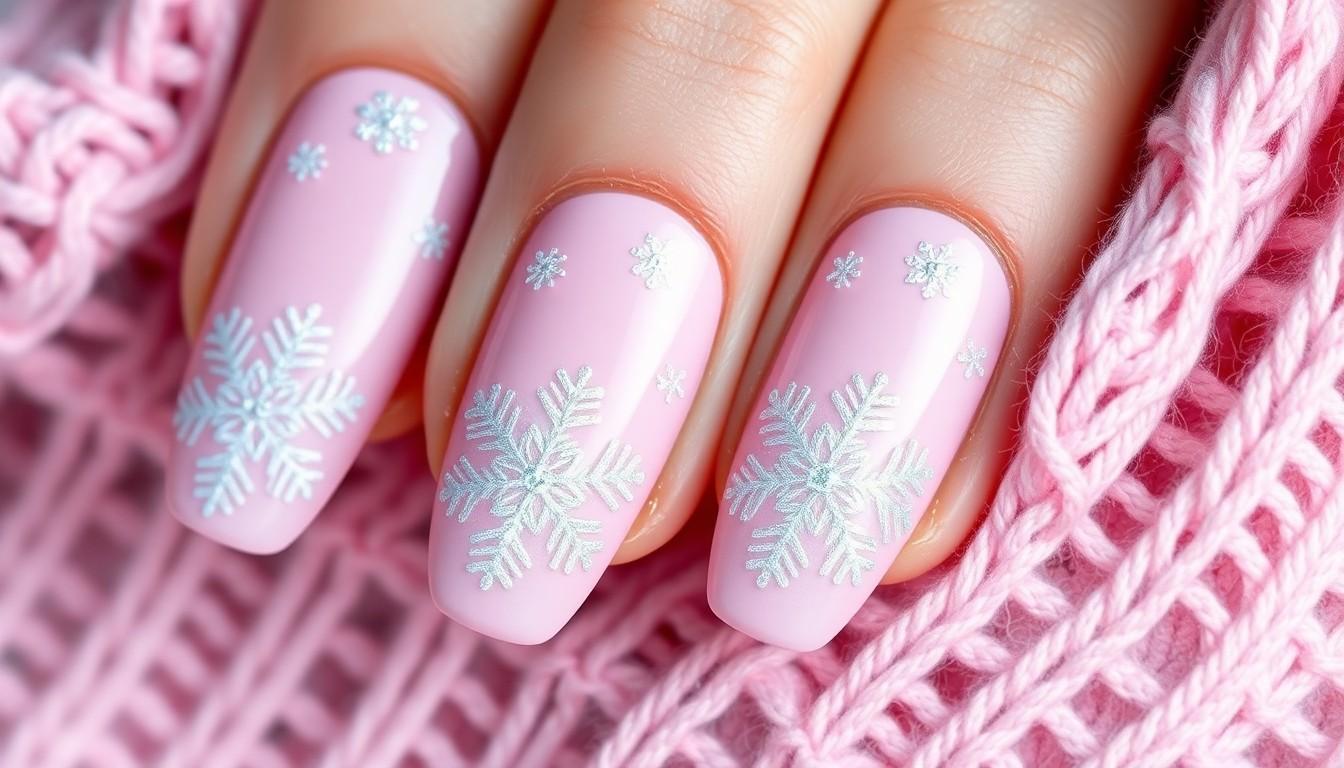
Transform your nails into a dreamy winter fantasy with soft pastel pink bases that evoke the magic of the season. These delicate designs create a sophisticated yet festive look that offers a feminine twist on traditional Christmas colors.
Designing Delicate Snowscape Backgrounds
Pastel pink polish serves as the perfect canvas for creating enchanting snowscape backgrounds on your nails. Start with a light pink or blush shade as your base color to establish that soft winter wonderland feeling. Apply subtle snowflake patterns or gentle snowfall effects using white or clear polish with glitter for an ethereal look. These designs can be achieved through freehand painting or by using nail stamps for more precise detailing. The “Bright Pink Knit and Snowflake Nail” design combines vibrant pink with cozy winter elements, featuring dainty snowflakes with pink glitter on accent nails. Textured patterns, such as knitted designs in baby pink, add a realistic touch that mimics the coziness of winter attire. Consider incorporating pale pink polish with additional festive details like tiny snowmen or miniature Christmas trees in lighter complementary shades for a complete winter wonderland scene.
Adding Dimension with White Detailing
White accents instantly elevate pastel pink Christmas nails by creating depth and visual interest. Paint intricate white snowflakes, snowmen, or other winter elements on top of your pink base to make your design pop. The “Pink Glitter and Candy Cane Stripe Nails” showcase how white snowflakes on a soft pink background can add a playful dimension to your manicure. Try a twist on classic French tips by using glittery white polish on a pink base for an elegant yet festive appearance. Dimensional effects can be achieved through layering techniques, where white polish is applied in varying thicknesses to create a raised, almost 3D effect. Glittery accents in white or clear polish enhance the festive feel while adding important depth to your design, making it more visually captivating. Consider using a fine detail brush for precise white detailing work, focusing on creating clean lines and symmetrical patterns for a professional-looking finish.
Matte Pink with Glittery Christmas Accents
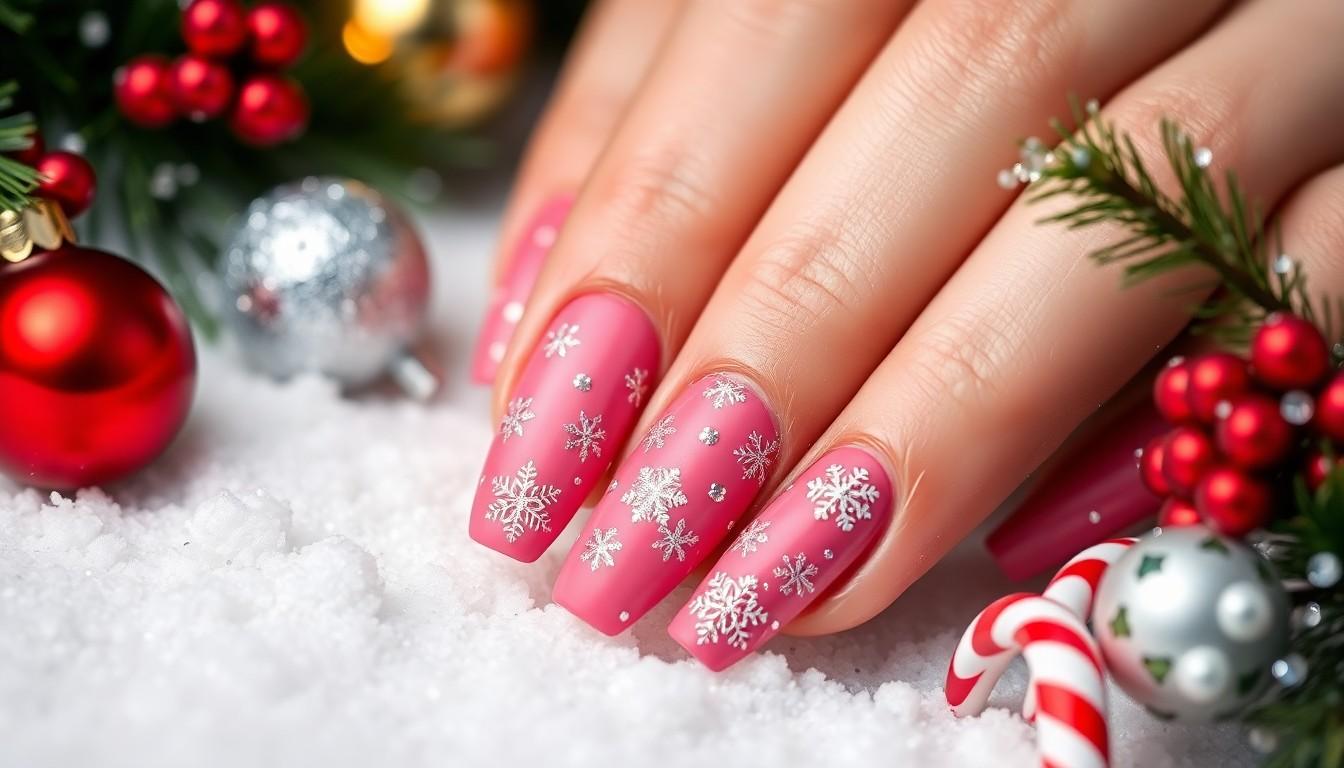
Matte pink nail polish creates the perfect canvas for showcasing glittery Christmas accents, offering a sophisticated yet festive holiday manicure option. This combination balances subtlety with sparkle for an eye-catching seasonal look.
Perfecting the Matte Base Application
Achieving a flawless matte pink base starts with proper nail preparation, including thorough cleaning and applying a quality base coat. Apply thin coats of your chosen pink matte polish, allowing each layer to dry completely before adding the next to prevent streaking and ensure even coverage. Multiple thin layers will provide better opacity and a smoother finish than one thick coat. Finish with a specialized matte top coat to seal the color and maintain that velvety, non-reflective finish that makes matte manicures so distinctive. Soft pastel pinks create an elegant winter wonderland feel, while vibrant hot pinks offer a more dramatic holiday statement.
Strategic Placement of Glitter Elements
Creating standout Christmas designs requires thoughtful placement of glittery accents on your matte pink base. Use fine nail art brushes to paint delicate snowflakes with silver or white glitter polish on one or two accent nails for a sophisticated look. Transform your nails into candy canes by applying glitter polish in strategic stripes, especially effective when done on the tips or as an accent design. Glittery French tips offer a modern festive twist that pairs beautifully with the matte pink base, creating elegant contrast. Add playful holiday spirit with Santa faces or Christmas trees using precise brush strokes and sparkly polish on exact nails. For a cohesive look, try pink glitter with candy cane stripe combinations that blend festive patterns with shimmering pink elements. Consider pastel pink polish with cute Santa faces and sparkling glitter accents for a light, elegant Christmas design that maintains sophistication while showcasing holiday cheer.
Pink Marble Nails with Gold Christmas Motifs
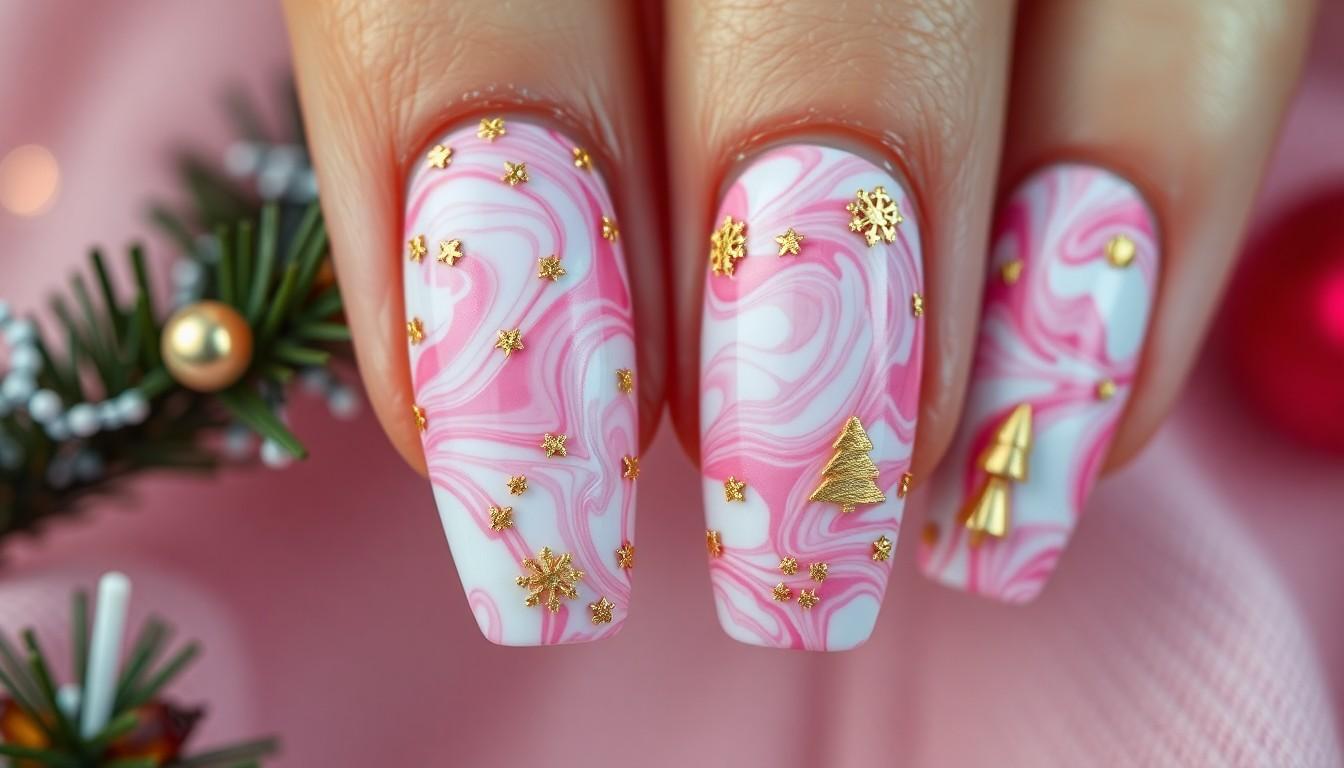
Pink marble nails with gold Christmas motifs combine elegance with festive flair, creating a luxurious manicure perfect for holiday celebrations. This sophisticated design pairs the dreamy swirls of pink marble with eye-catching gold accents for a truly stand-out look.
Creating the Perfect Marble Swirl Effect
Achieving a stunning marble swirl effect requires a combination of pink and white nail polishes applied with precision. Start by applying a clear base coat to protect your natural nails and ensure smooth application. Drop small amounts of both pink and white polish onto the nail surface while they’re still wet. Use a thin nail art brush or toothpick to gently swirl the colors together, creating that characteristic marbled, mottled appearance. Allow each nail to dry completely before moving to the next step to prevent smudging your beautiful marble pattern. The key to a realistic marble effect lies in keeping your swirls random and organic rather than uniform or overly structured.
Incorporating Gold Foil Christmas Elements
Gold accents transform your pink marble nails into festive holiday masterpieces. Apply a small amount of nail glue or special adhesive to exact areas where you want your gold elements to appear. Carefully press gold nail foil or gold leaf onto the adhesive, then use a cuticle pusher or cotton swab to smooth out any wrinkles or air bubbles. Consider adding festive motifs such as tiny gold snowflakes, Christmas trees, or delicate bells to enhance the holiday spirit. Seal your design with a quality top coat to preserve the gold elements and add extra shine to your manicure. For more intricate designs, additional embellishments like fine glitter or small rhinestones can be strategically placed around your gold motifs, creating dimension and catching the light beautifully when you move your hands.
The Ultimate Pink Christmas French Tip Variations
Pink Christmas nails offer the perfect blend of festive charm and feminine elegance. Whether you’re drawn to sparkling snowflakes or candy cane stripes there’s a pink holiday design for everyone. The versatility of pink allows for endless creativity from subtle blush tones to bold fuchsia statements.
We’ve seen how marble effects geometric patterns and sugar-coated textures can transform your holiday manicure into a true work of art. These designs aren’t just beautiful they’re conversation starters at every gathering.
This season don’t hesitate to experiment with pink as your holiday canvas. It’s the perfect way to express your personal style while embracing the magic of Christmas. Your festive pink manicure awaits – ready to spread holiday cheer with every gesture!
Frequently Asked Questions
How do I create pink and silver snowflake nails?
Start with a vibrant pink base coat, then add silver snowflakes using a fine brush, nail stamps, or decals. For dimension, incorporate white polish for highlights and holographic glitter for sparkle. Let each layer dry completely before adding the next to prevent smudging. Complete the look with a quality top coat to seal your design and add shine.
Can pink Christmas nails work for a formal holiday event?
Absolutely! Pink Christmas nails can be elegant and sophisticated for formal events. Choose designs like champagne pink French tips, pink marble with gold accents, or matte pink with subtle glitter accents. These options offer festive flair while maintaining a refined appearance. For maximum elegance, opt for a cohesive color scheme and limit the number of accent nails.
What tools do I need for candy cane-inspired pink nails?
You’ll need a pink base polish, white stripe polish, nail guides or striping tape for crisp lines, a fine detail brush for clean edges, and optional metallic powder (gold or silver) for accents. A good quality top coat is essential for sealing the design. Tweezers help with tape placement, and a cleanup brush dipped in acetone helps perfect the edges.
How do I achieve a pink ombré effect for Christmas nails?
Create a pink ombré by applying a darker pink shade at the tip, a lighter pink in the middle, and a very pale pink near the cuticle. While still wet, blend the colors using a makeup sponge or gradient tool with dabbing motions. For a festive touch, add ornament details with glitter, stickers, or hand-painted elements once the ombré base is completely dry.
Are pink Christmas nail designs suitable for short nails?
Yes! Pink Christmas designs work beautifully on short nails. Opt for simpler patterns like mini candy canes, small snowflakes, or accent glitter nails. Vertical designs (like stripes) can create the illusion of length. Focus detailed art on just 1-2 accent nails while keeping others in complementary solid pink shades for a cohesive, flattering look that doesn’t overwhelm shorter nail beds.
How long will pink Christmas nail art last?
With proper application and care, pink Christmas nail art can last 7-10 days. Use a quality base coat and top coat, and apply thin layers of polish to prevent chipping. Seal the free edge of your nails with top coat to minimize wear. Wear gloves for household chores and apply cuticle oil daily to maintain flexibility. Touch up any minor chips to extend the life of your festive manicure.
What’s the best way to create 3D effects on pink Christmas nails?
Create 3D effects by using textured polishes, adding rhinestones or charms with nail glue, or building dimension with gel polish that’s cured between layers. For sugar-coated effects, sprinkle fine glitter over slightly wet polish. Apply embellishments after your base design is dry, and seal with a thick top coat (or gel top coat) to secure everything while maintaining the raised texture.
How do I incorporate geometric patterns into pink Christmas nails?
Use striping tape or nail guides to create clean geometric shapes on a pink base. Apply rose gold or metallic polish for bold accents in triangles, stripes, or diamond patterns. Remove guides while polish is still slightly wet for crisp lines. For holiday flair, incorporate geometric snowflakes or abstract Christmas tree shapes. Finish with a top coat to blend the design seamlessly.
Can beginners create pink winter wonderland nail scenes?
Yes! Beginners can start with a light pink base and add simple elements like white dots for snow or basic snowflake shapes using a dotting tool. Practice on a nail wheel first. Use nail stickers or decals if hand-painting seems challenging. Focus on one accent nail while keeping others in coordinating solid colors or simple glitter. Build skills gradually by adding more details with each manicure.
How do I balance matte pink polish with glittery Christmas accents?
Start with a well-applied matte pink base, ensuring even coverage. Add glitter accents strategically—focus on 1-2 accent nails or create French tips with glitter. For subtle designs, place small glitter elements like a single snowflake or delicate ornament on each nail. The contrast between matte and sparkle creates visual interest without overwhelming. Finish with a matte top coat, carefully avoiding the glitter elements.


